When it comes to a manicure, gel nails are by far the best option in terms of durability. They resist the chips and loss of shine, unlike your average paint job. A good one can last as long as three weeks. In a nutshell: they're what everyone wants from a manicure. However, regular gel manis in-salon can leave you and your bank balance on bad terms. So, a DIY gel nail kits could be the way to go if you’re in need of a little pick-me-up.
But how do you get that perma-shine effect without the expertise of a technician? You can opt for a gel topcoat or gel nail polish, which tends to be thicker in consistency and more hardwearing than your average polish. Or, you can invest in an LED kit for a pro mani at home like the popular Mylee Gel LED Kit, or the Le Mini Macaron Gel Manicure Set. We asked session manicurist, Jenni Draper gel manicure-lover and beauty blogger Josie Fear of Fashion Mumblr for all their top tips.
The gel manicure dos and don'ts
DO: ‘Give yourself enough time to neatly paint your nails before applying a gel top coat. There's nothing worse than having messily painted nails for 2 weeks. Also, make sure you give enough drying time (at least 30 mins, but overnight is best) before applying the gel topcoat, otherwise it will go bubbly.’
DON'T: ‘Paint the polish on too thick - it will just make it easier for the nail varnish to peel. It's better to do three really thin coats than one thick one.’
DO: ‘Pay attention to the tips of your nails, run the polish wand horizontally across the top edge of the nail to seal in the ends. This should prevent chips.’
DON'T: 'Throw away all your non-gel nail varnishes. There are so many great kits out there that turn ANY nail polish into a gel, so invest in one of these and all of your favourites can be used in your gel manicure.'
SHOP: The Best Gel Nail Kits And Gel Polishes
 1 of 3
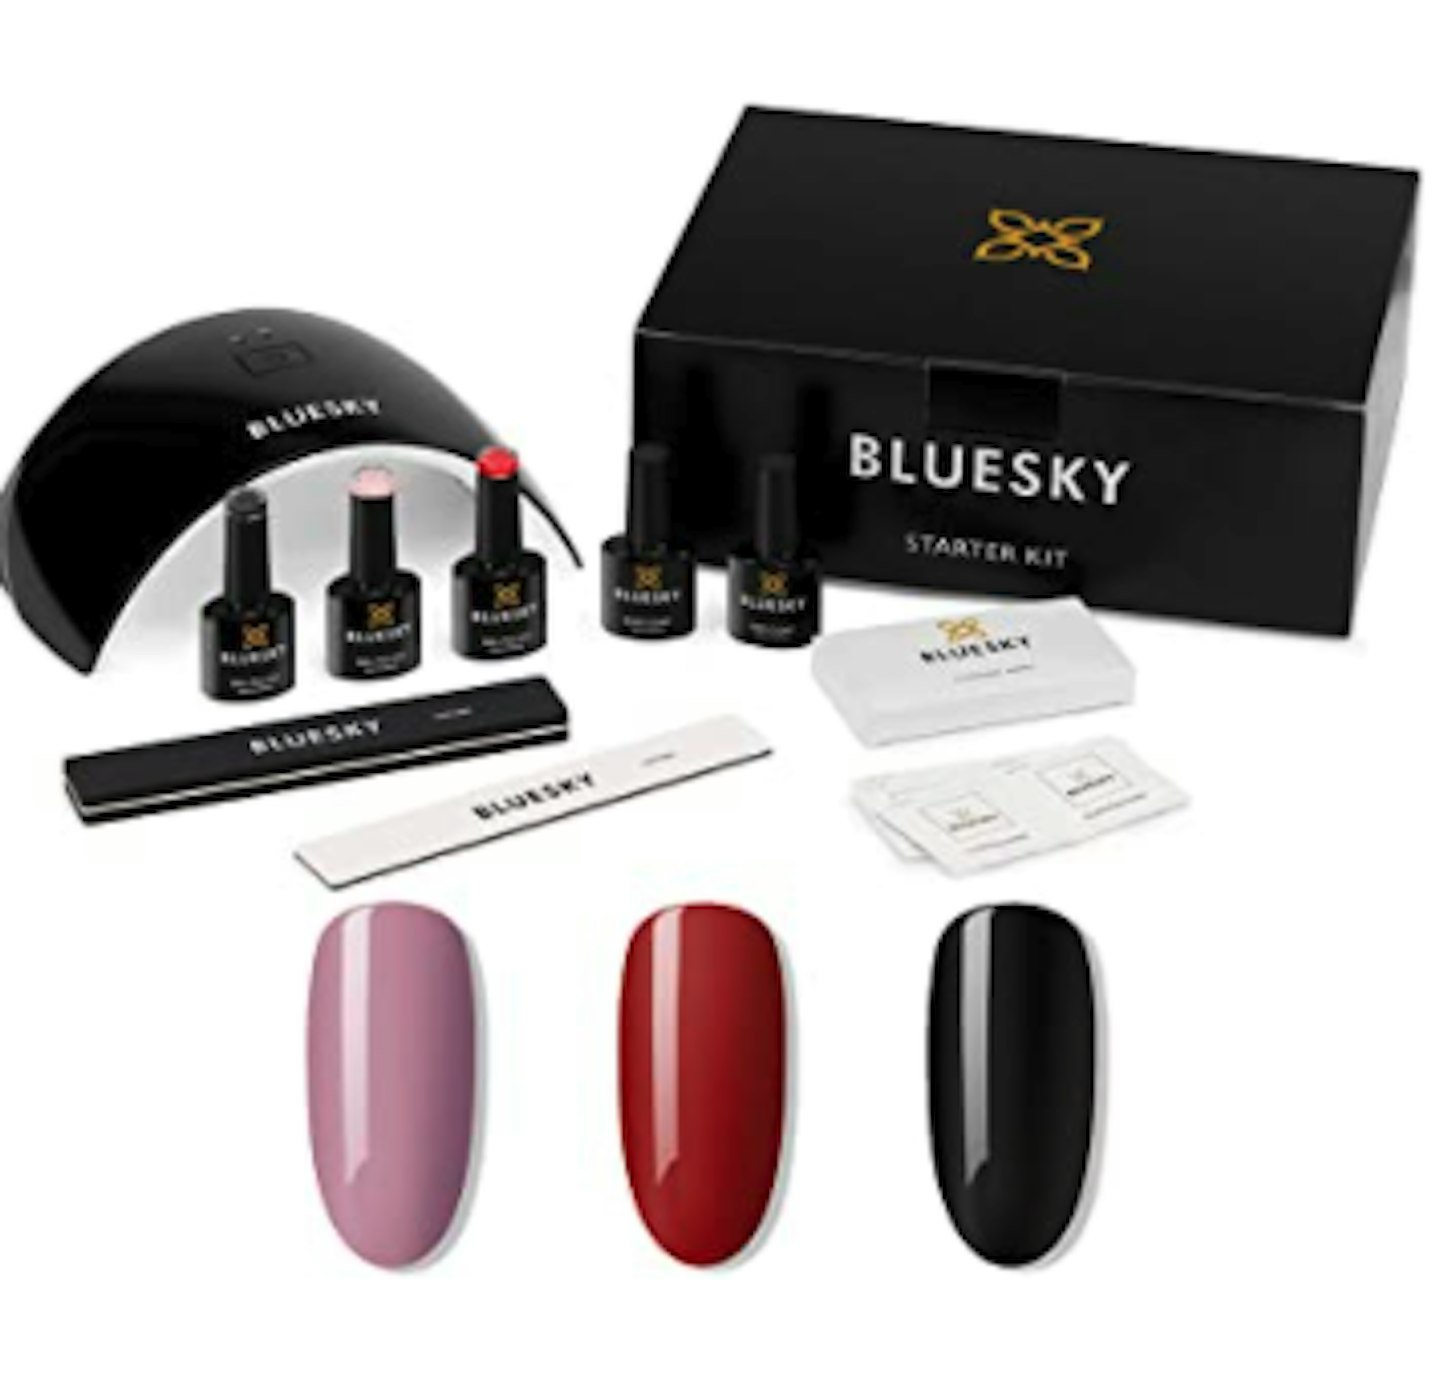
Bluesky Gel Nail Polish Starter Kit
Summary: This gel nail kit is as simple as they come, the polish selection is varied but doesn't come with a lighter nude shade. Nor does it have any added extras like gel nail remover fluid or any lint-free wipes. However, it's simple and straightforward to use, with a convex black UV/LED lamp that is a little on the smaller side but still fits your whole hand in.
Details: Inside the kit you'll find 24w UV/LED Lamp, Top Coat, Base Coat, Cleanser Wipes, Nail File, Nail Buffer and three x 10ml Gel Nail Polishes - Pillar Box Red, Musk Pink and Blackpool.
£47.99
- Rrp: £59.99

 2 of 3
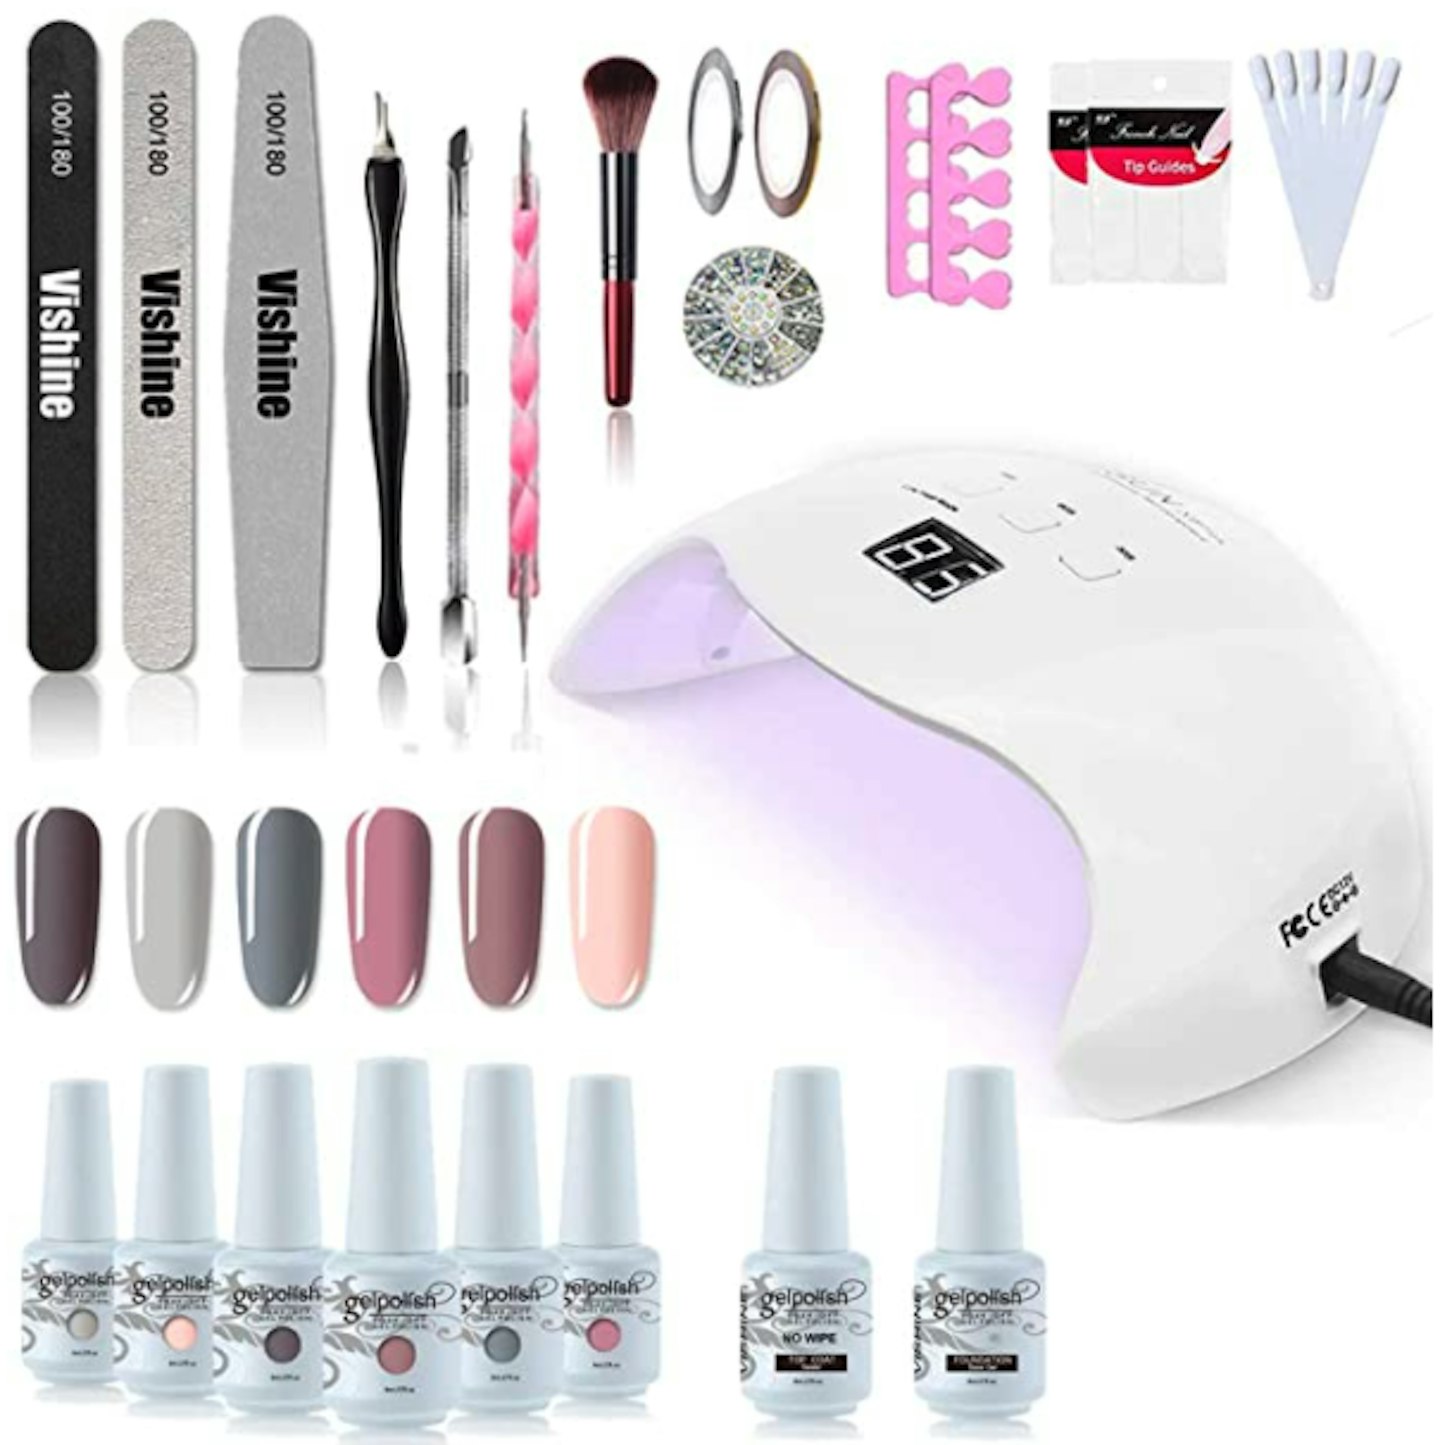
Vishine UV LED Nail Lamp Gel Nail Kit
Summary: Another popular gel nail starter kit on Amazon, with over 2,000 ratings of an average of 4.6 out of 5. This gel nail kit goes the extra mile with plenty of added extras, like a dotting pen for nail art, striping tape, nail separators and a cuticle fork.
Details: This kit includes six Gel Nail Polishes, a 40W Nail Lamp, top coat, base coat, nail file, nail buffer, nail brush, cuticle fork, dotting pen, cuticle pusher, nail separators, revitalising nail pen, French stickers, gold and silver striping tape.
£46.99
 3 of 3
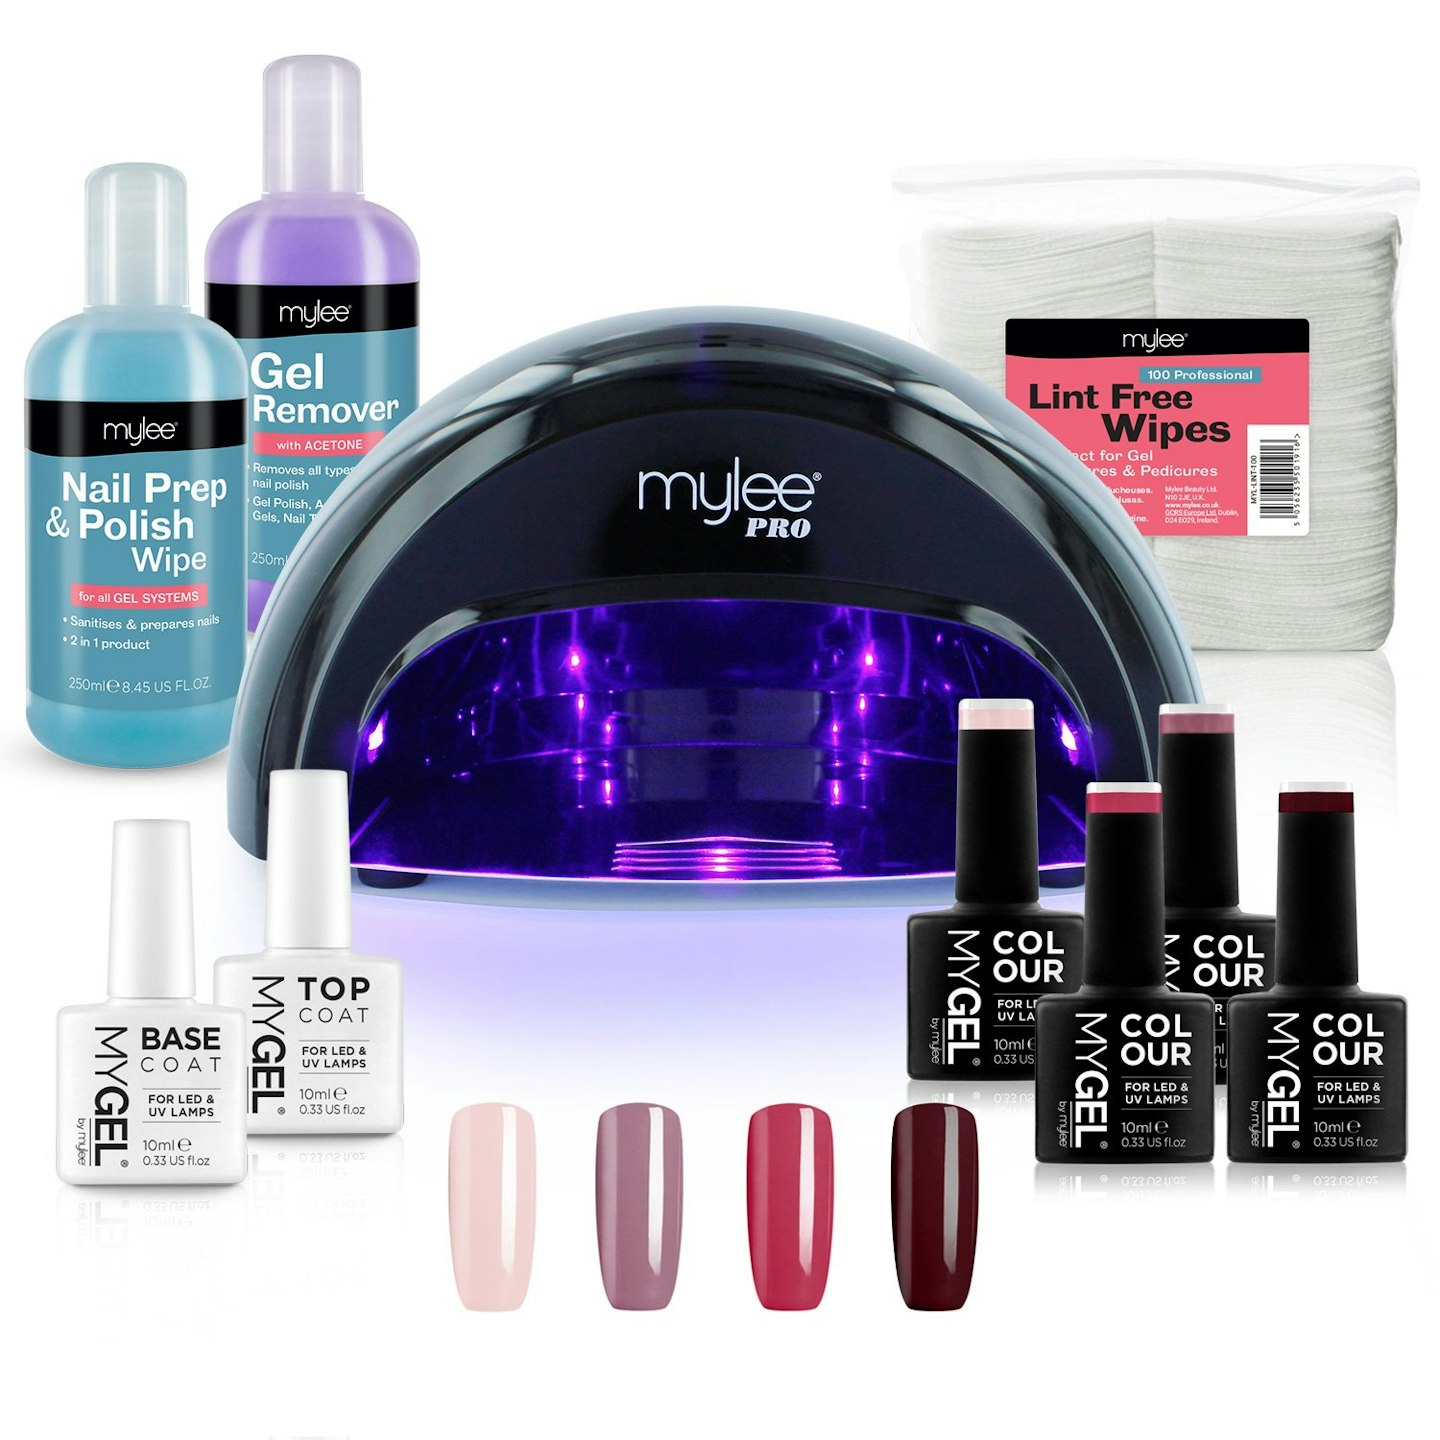
Mylee, Gel Polish LED Manicure Kit
Summary: As you can see from the pic, this kit has literally everything you could possibly need to do an at-home mani. Details: With prep+prime wipes, cuticle oil, nail file, top and base coat and 8 polishes to choose from - you won't be leaving the house in a hurry.
£89.99

How to apply gel nails at home?
Jenni Draper talks us through how to do the ultimate at-home gel manicure in 10 simple steps (it takes approximately 60 minutes):
1. ‘Ensure cuticles (any skin on the nail bed) are pushed back using a tool like Tweezerman Dual Sided Pushy Cuticle Stick, £16, but avoid using cuticle clippers. If the cuticles are cut incorrectly it can lead to infections and cause the skin to grow back thicker, so leave that to the experts.’
2. ‘File your nails to your preferred length and shape (to discover all the various nail shapes, read our guide here). Don’t “seesaw” with your file, just go gently in one direction and back again the other way.’
3. ‘Using a soft nail buffer, go from the cuticle to the free edge (the white of the nail), removing shine and leaving the nails with a smooth, ridge-free base. There’s no need to over-buff, just go gently, before brushing any excess dust off.’
4. ‘Using a lint-free wipe (better than cotton wool) and a nail cleanser for gels, scrub over the nails to remove oils and dust, leaving them squeaky clean.’
5. ‘Apply a thin layer of specialised “gel” base coat, being careful to only apply to the nail, avoiding the skin. If any touches the skin, use a cuticle or cocktail stick to remove it straight away, before curing in the LED light box recommended for your gel system, for the recommended amount of time.’
6. ‘Now apply your coloured gel polish. Don’t overload the brush with product and wipe any excess off one side of the brush. When you place the brush on to the nails, start just above the cuticle area and push it gently down to the cuticle area – this will prevent you “flooding” the cuticles with colour. Try to use three strokes of colour up the nail to give you an even coverage and “cap” the end of the nail. Also, try not to drag the brush too much: less pressure will give you fewer brush lines. And again, if you touch the skin, clean it off before curing. Do two nails at a time to prevent the colour shrinking. Cure for recommended time. Repeat on the next two nails.’
7. ‘Now paint the thumbs. Do one stroke across the thumb as the cuticle is straighter and this will give you a neater line, then do your strikes up the nail – you will probably need to do four to five. Cure. If you find the thumb isn’t curing, try putting it in the light straight on and the fingers underneath for a more even cure.’
8. ‘Apply your second coat of colour, perfecting your coverage. Repeat steps 6 and 7.’
9. ‘Now, apply your specialised gel top coat. Make sure that all areas of gel polish colour are covered and the end of the nails “capped”. Avoid applying too thickly as this can cause the final gels to have a wrinkled effect, which will need to be removed and reapplied.’
10. ‘Finally, wipe over the nails with a cleanser from your kit and finish off with a nourishing nail oil and hand cream. I love Dadi’Oil, £7.50, and Chanel La Creme Main, £45.’