Brow lamination hit the big-time last year after countless bloggers and models filled our feeds with their perfectly groomed, slicked-up arches. In 2019, Treatwell saw a 465% rise in bookings for the eyebrow treatment and this year google searches for ‘brow lamination’ have upped by an impressive 511%. Why the hype? The treatment, which uses two different solutions to set the hairs in place, creates a fluffy, ‘just-brushed’ look that feigns the appearance of fuller-looking brows. And now, thanks to its increased popularity, several brands have released brow lamination kits and products designed to give you that fuller look without having to step outside the house (which is ideal for those of us who have taken to lockdown life).
To see if the results match up to those in the salon, Grazia’s Beauty Writer Emma Stoddart puts it to the test. The kit of choice? B Bare’s Home Brow Lamination Kit. Coming in at £88, it’s not cheap, but the set will last up to 10 uses – which works out at £8.80 a session (much more palatable). To find out how to laminate your brows at home and to see the finished result, scroll on down…
The Brow Lamination Kit
B Bare Home Brow Lamination Kit, £88
 1 of 1
B Bare Home Brow Lamination Kit, £88
Complete with two solutions, a brow glue, brow film and spoolies - this kit has everything you need to achieve those fuller-looking, insta-worthy brows.
How To Laminate Your Eyebrows At Home
Before you start, make sure you do a quick patch test at least 24-hours before and if you don't see or feel a reaction - you're good to go.
DIY Brow Lamination At Home
 1 of 3
Step 1: Brow Glue
Begin by removing any make-up and cream from the brows (the B Bare kit comes with a brow cleanser for this). Next, apply the brow glue with a spoolie (also in the kit) to set the hairs in your desired direction. I brushed mine up and out. Top tip? Apply the glue in sections to avoid it setting before you're happy with the placement.
 2 of 3
Step 2: Solution + Laminate
Once your brows are in place, apply the first solution called 'Step 1 Super Lift' using the styling wand in the kit. This cream breaks down the bonds of each hair, allowing the brows to be re-shaped. Next? Wrap your brows (and head) with the brow film (aka clingfilm) and leave them to cook for 3-6 minutes. Once the development time is up, remove the brow film and product with a cotton pad.Repeat this step again but this time using 'Step 2 Neutralise' which will fix the hairs into place.
 3 of 3
Step 3: Hydrate Serum
After applying the second solution and wrapping the brows, remove any excess product before gently brushing up the hairs and coating them with 'Step 3 Hydrate Serum'. This will leave your brows hydrated and nourished.
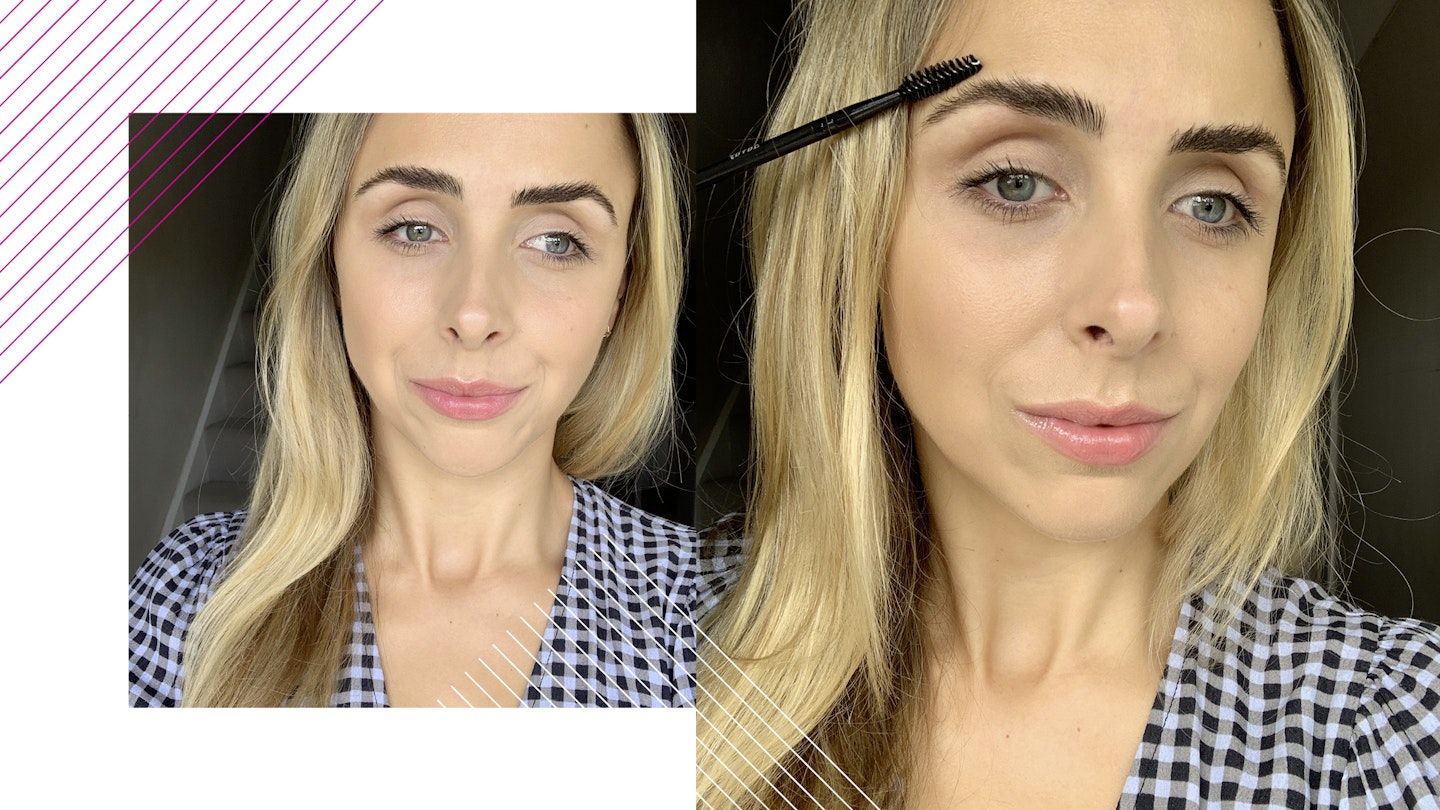
Brow Lamination Kit: The Verdict
'I can’t leave the house or turn on Zoom without brushing up my brows. It’s that one desert island product that makes me feel put together and ready to take on the day. Without putting my brows ‘on’ I feel a bit naked – which is why I was a little (ok, a lot) excited to try this brow lamination kit. As a brow lamination virgin, I can’t compare the results to those of an in-salon treatment, but I can compare it to my daily chore of filling in and brushing up my brows.'
'The kit itself is really easy to use and took approximately 15 minutes from start to finish (minus the selfie taking). It’s just a case of dabbing the product on, wrapping your head in clingfilm and repeating.'
'As for the results - my brows are definitely more upright and fixed into place and as a result they do look fuller. However, I love a more dramatic look so would probably spend the money and book an appointment in-salon to compare the results. But with that said, for those of you who prefer a subtle effect for the fraction of the price – this one’s for you.'
If you need more persuading, just look to Sarah Ashcroft's amazing before and after using the brow lamination kit above.
READ MORE: Here's Why Brow Lamination Is Worth The Hype
READ MORE: DIY Threading: How To Thread Your Eyebrows At Home